Your first API
A new account comes with a sample shop : an instance named mongodb, with the tables categories, customers, products, orders and orderItems. In ten minutes you point it at a database, save a product, read it back, and watch API Maker refuse a bad one. You do it all in the admin panel. At the end, your own app makes the same call.
In short
- In the default secret, type a password for the API user
defaultand the address of your MongoDB. - In Instance API, press Test Instance.
- In API Testing, pick a table and an API, then press SEND.
Nothing installed yet ?
Install API Maker first. Then add a MongoDB on the Databases page of Launchpad : its card shows the connection string to copy.
1. Connect a database
An instance never holds the password of its database. The password stays in the default secret, encrypted, and the instance names the key to read there.
Open Security → Secret Management, then edit the secret named Default. Set two values, then press Update Secret :
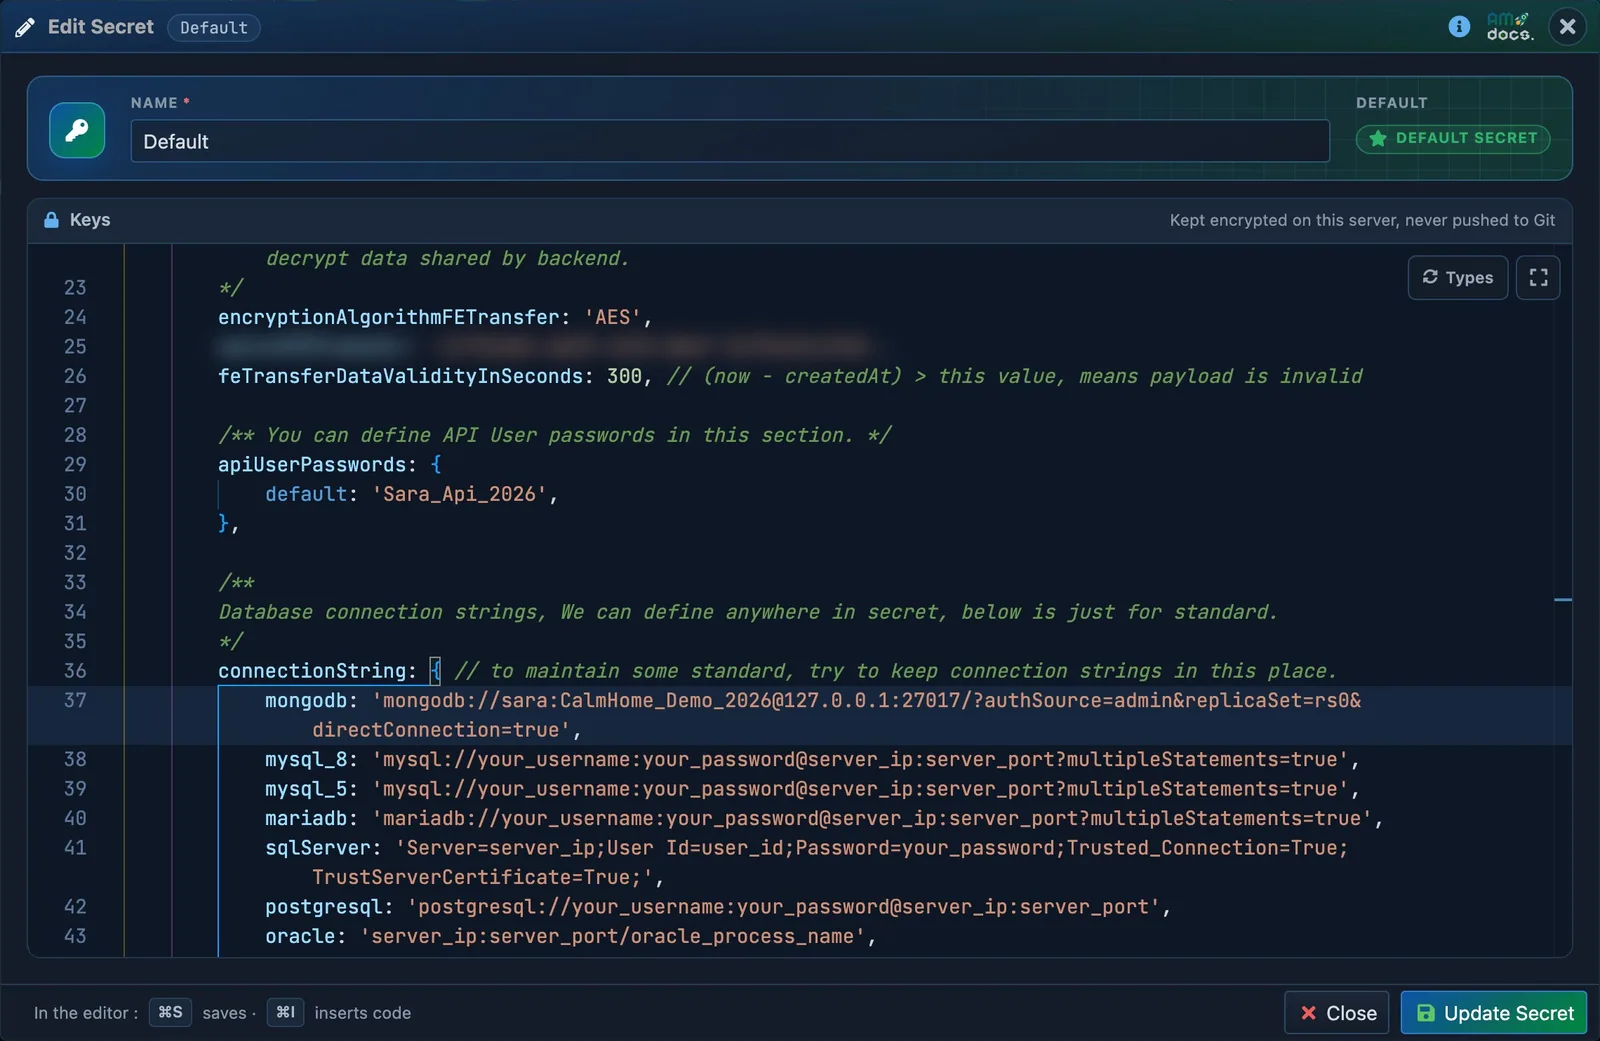
apiUserPasswords.default: a password for the API userdefault.connectionString.mongodb: how to reach your MongoDB.- Update Secret.
apiUserPasswords: {
    default: 'Choose_A_Password_1',    // the password of the API user "default"
},
connectionString: {
    mongodb: 'mongodb://user:[email protected]:27018/?authSource=admin&directConnection=true',
},
Where is the connection string of my MongoDB ?
- A MongoDB of Launchpad : its card, on the Databases page.
- MongoDB Atlas : Connect → Drivers on your cluster.
- Any other : see MongoDB connection strings. Every engine has its page.
2. Test the instance
Open APIs & Logic → Instance API (DB API). Pick the instance mongodb, press its edit button, then Test Instance.
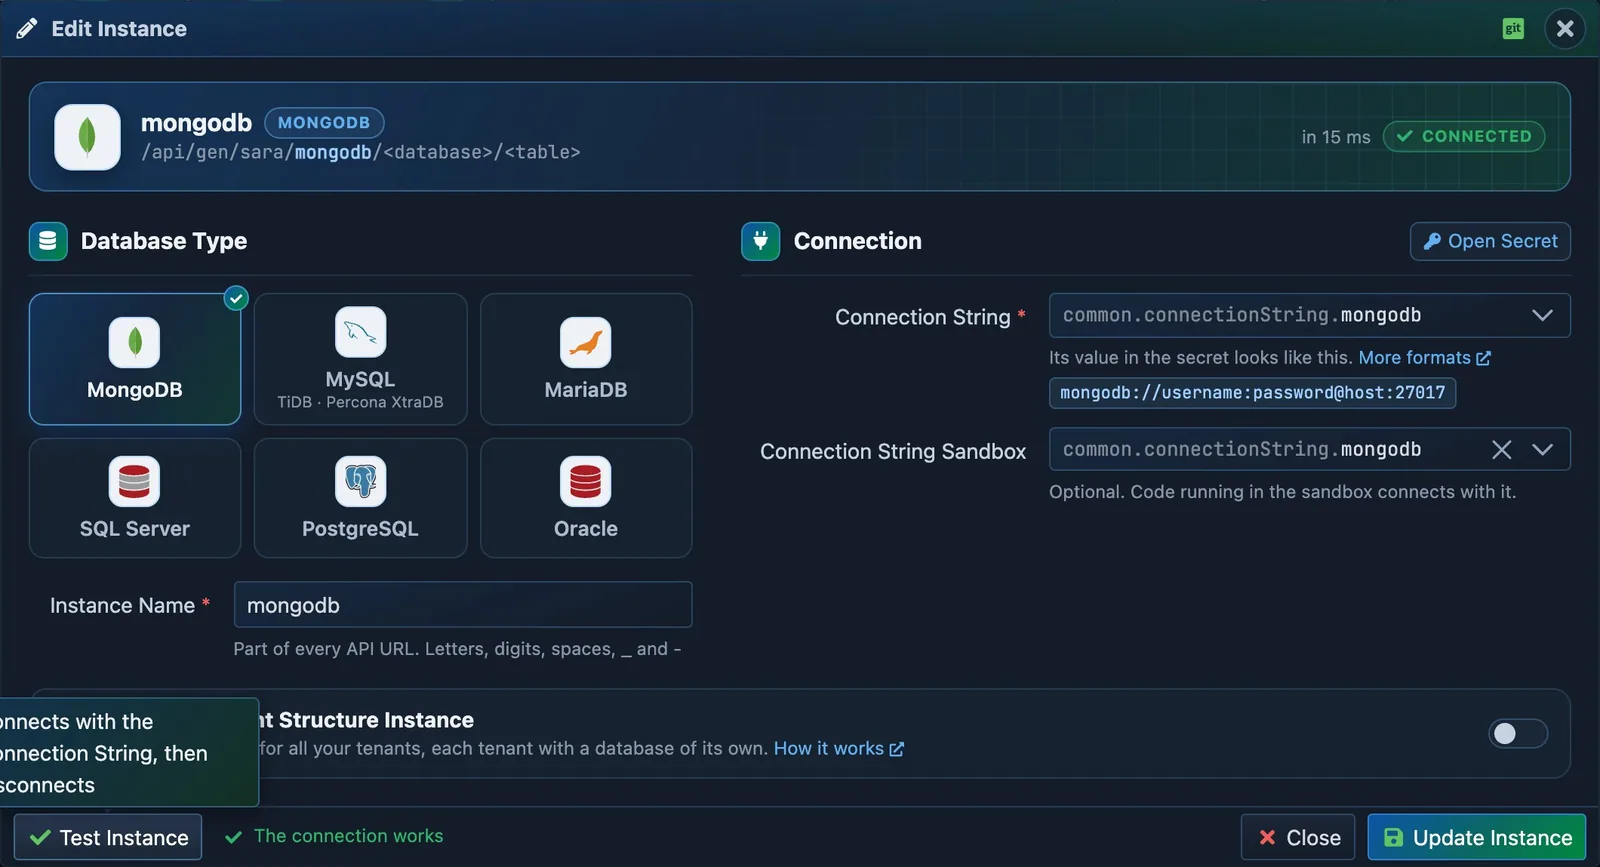
- The key of the secret this instance reads.
- Test Instance : it connects, then says so.
The connection works : API Maker reached your MongoDB. Close the dialog. The database shop shows up after your first save : MongoDB makes a database and its tables on the first write.
3. Save a category, then a product
Open APIs & Logic → API Testing. It calls any API of the account for you, with a token of the API user default.
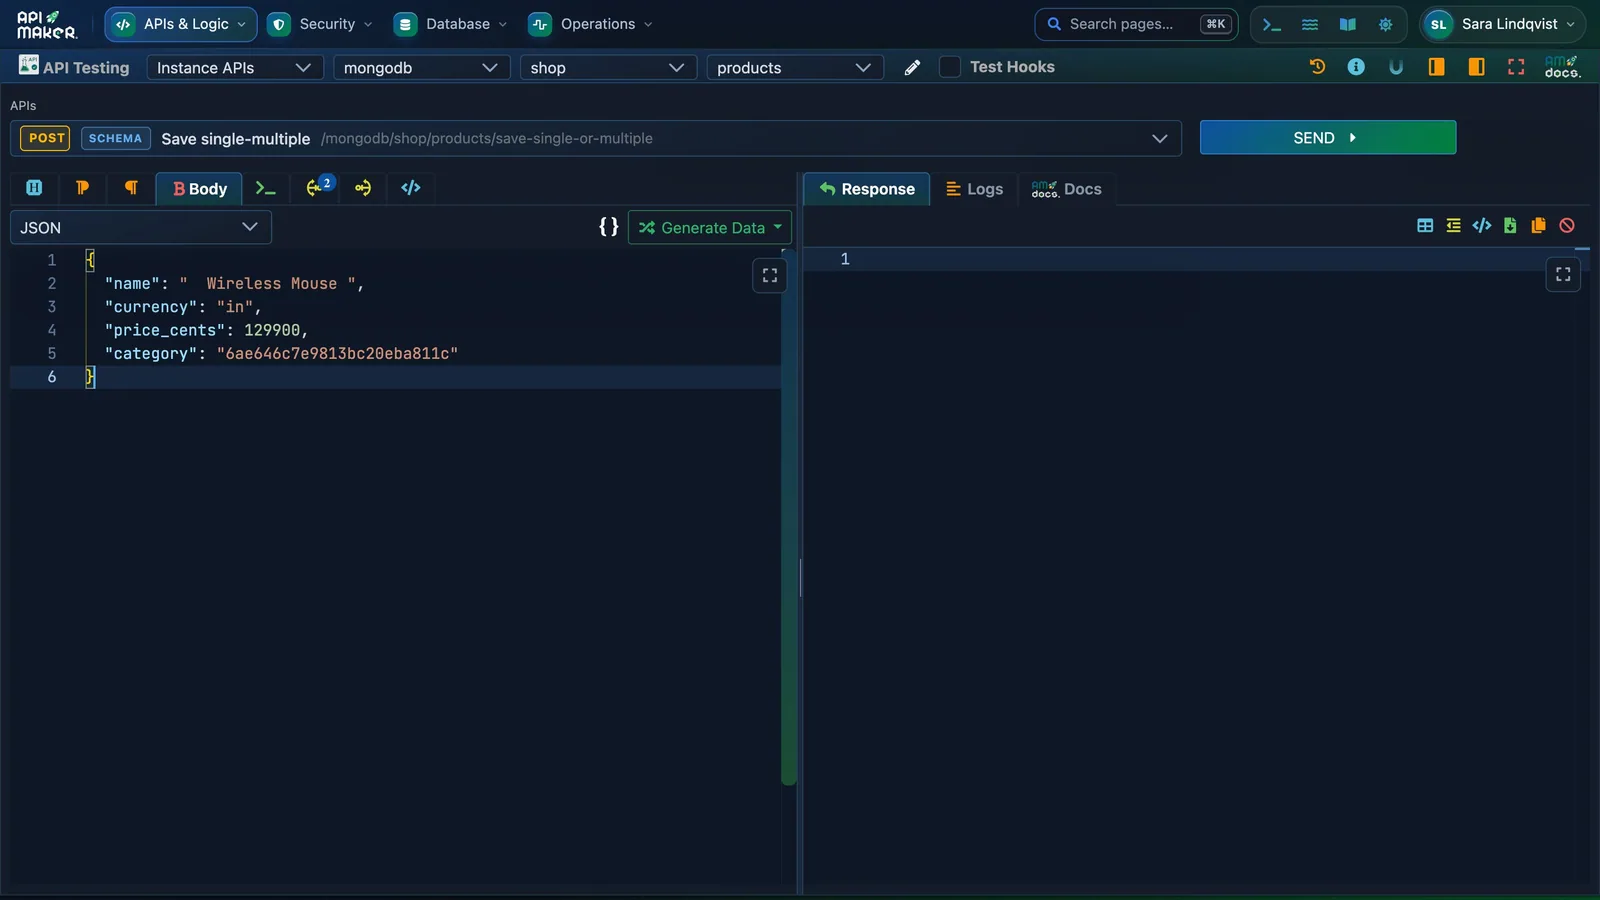
- The instance, the database and the table.
- The API : Save single-multiple.
- The Body : the row to save, in JSON.
- SEND.
A product belongs to a category, so the category comes first.
- Pick the instance
mongodb, the databaseshopand the tablecategories. - Pick the API Save single-multiple, open Body, and type :
- Press SEND. The answer shows the saved category. Copy its
_id. - Now pick the table
products, the same API, and this body. Paste the_idof the category : - Press SEND.
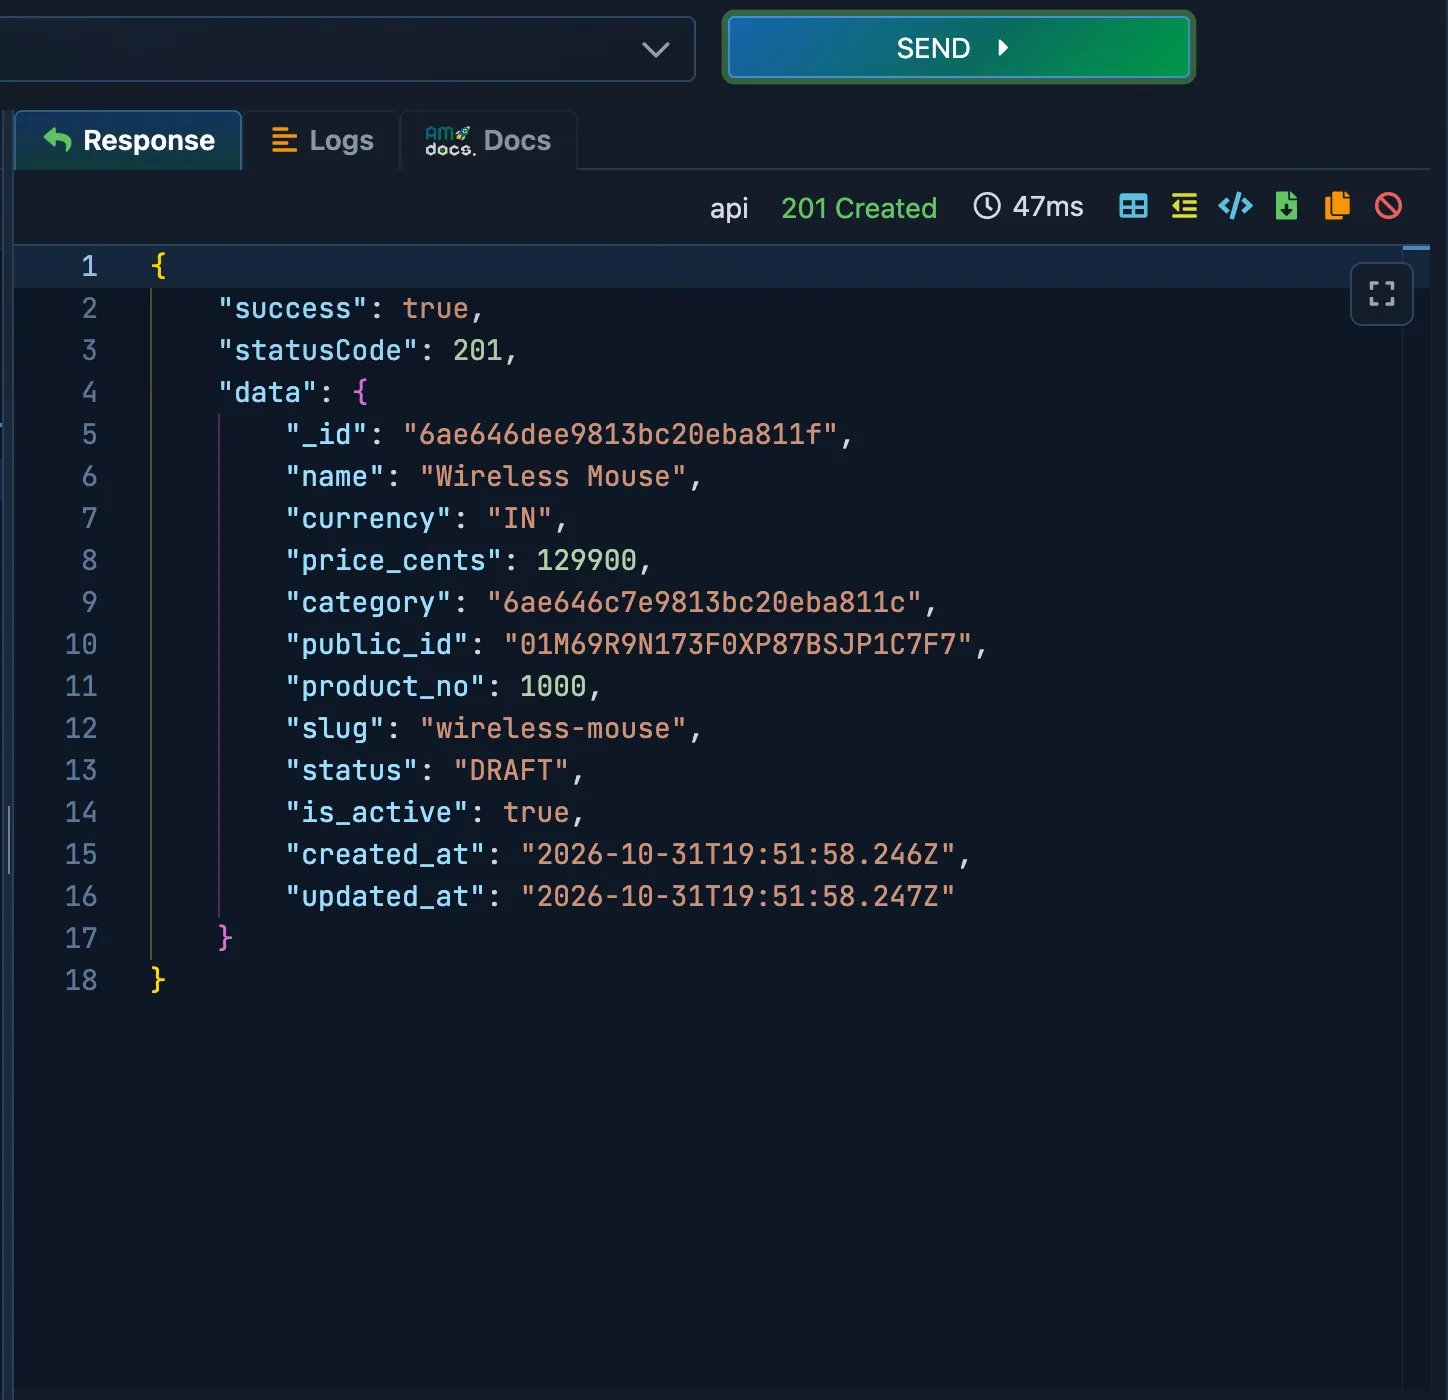
201 Created: the row is saved.- The row as the database holds it : name trimmed,
currencyin capitals, a number and a slug added.
Look at what the schema of products did on the way :
- the spaces around the name are gone, and
currencyis in capitals ; status,is_activeand the dates got their default values ;product_nogot the next number of a counter,public_ida unique id, andsluga value made from the name.
4. Read it back
Pick the API Get all. Open Query Params and fill two of them :
| Param | Value | What it does |
|---|---|---|
select |
name,slug,price_cents,category |
Only these fields. |
deep |
[{s_key:'category'}] |
Reads the category of each product, and puts it inside. |
Press SEND.
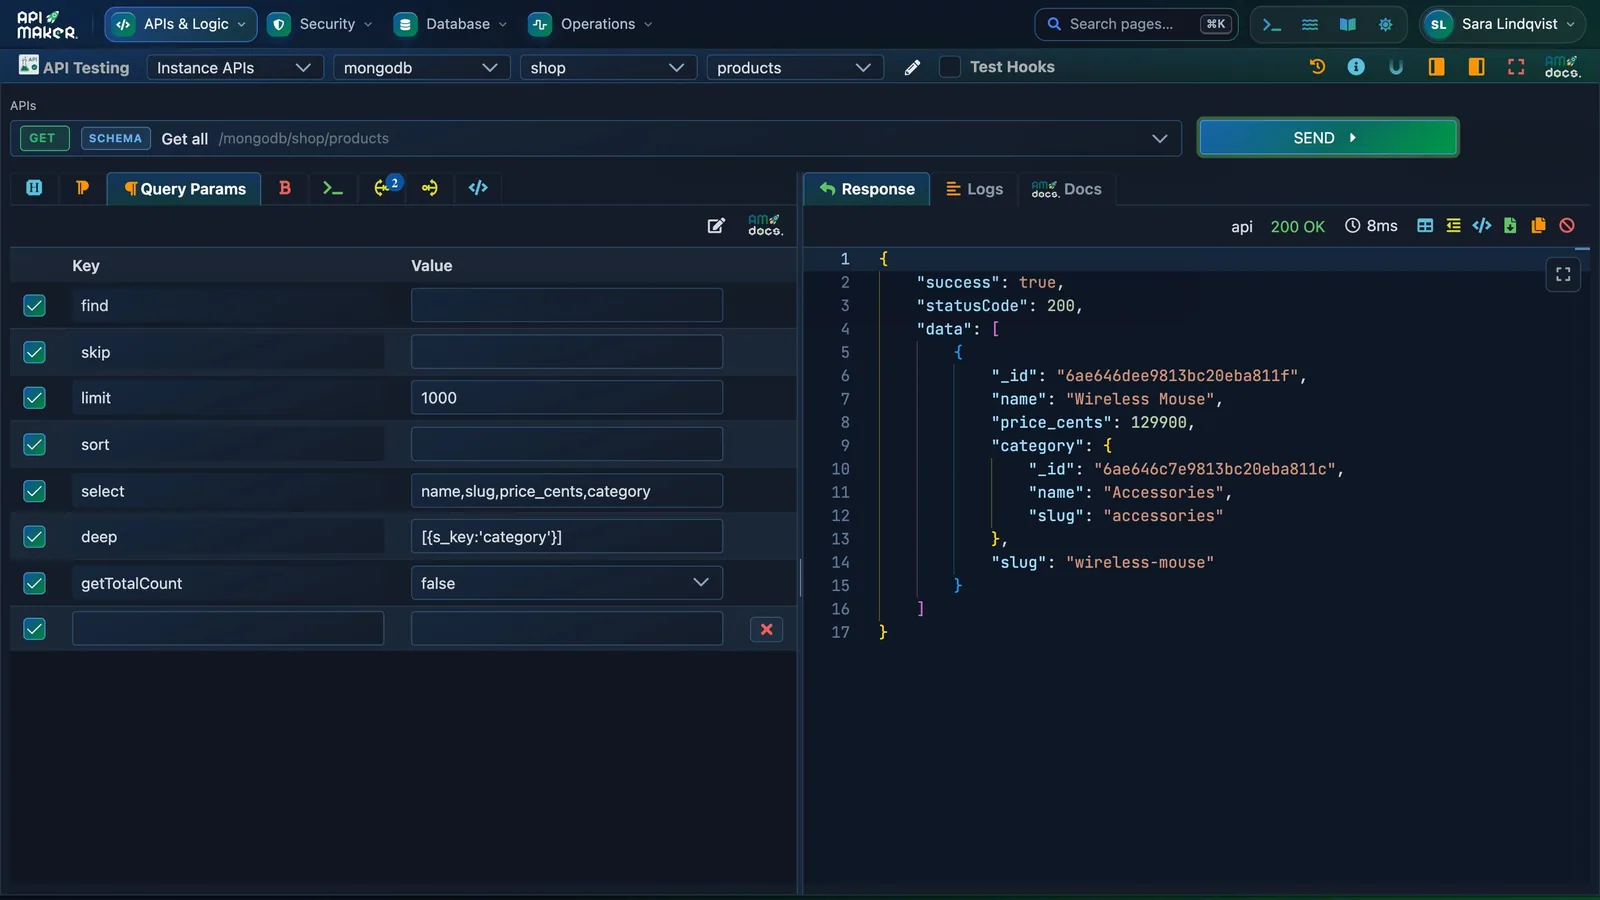
- The API : Get all.
select: the fields you want.deep: the category of each product, read for you.- The products, each with its category.
deep needs only the field : the schema knows that category points to the table categories. It works across tables, databases and even different kinds of databases : see deep and find for filters.
5. See a refusal
Save a product that breaks the rules : a name too short, a currency the schema does not know, a negative price, a discount without approval.
{ "name": "M", "currency": "EUR", "price_cents": -5, "category": "the _id of Accessories", "discount_pct": 10 }
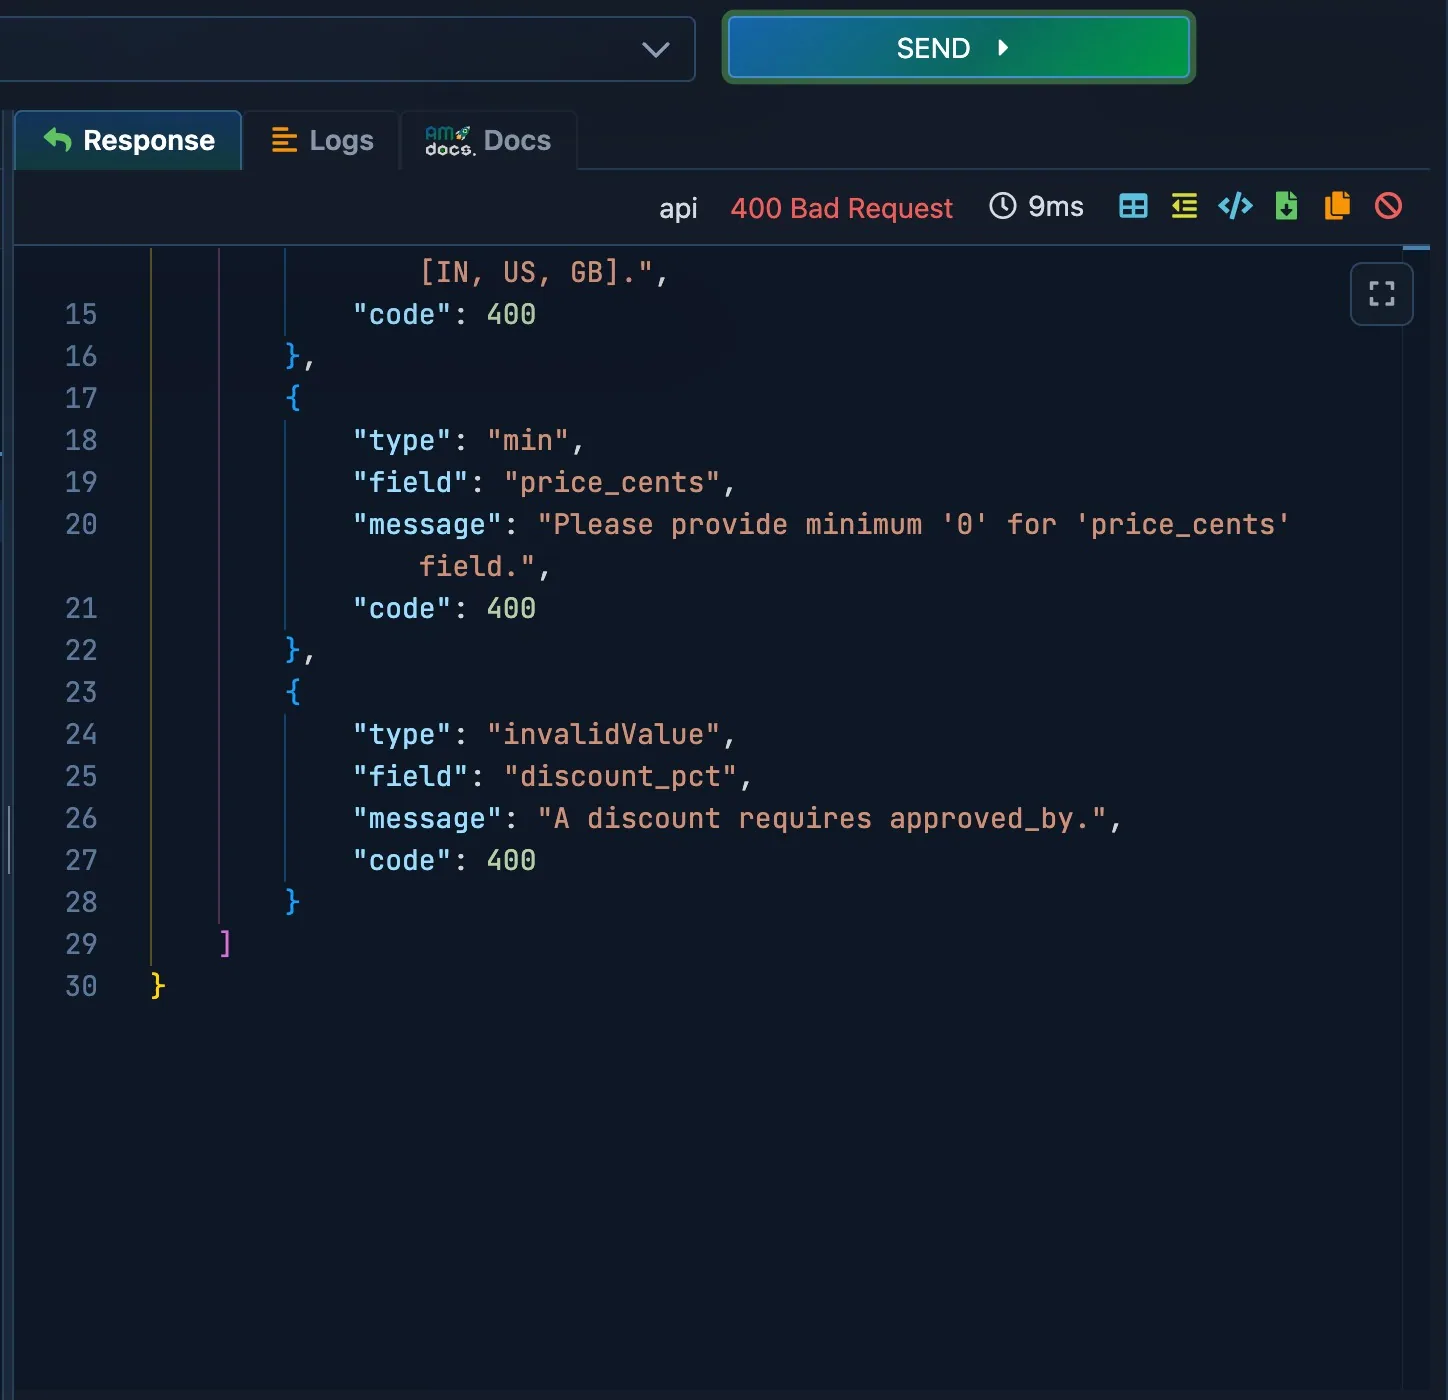
400 Bad Request: nothing was saved.- One error for each broken rule, all at once.
API Maker answers 400 with every problem at once, and saves nothing. Your app can show these messages next to the right fields.
6. Call it from your app
Your app does what API Testing did : it gets a token, then calls the URL with it. Here with curl. $AM is the address of API Maker : http://127.0.0.1:38246 on your computer.
Get a token for the API user default, with the password you typed in the secret :
curl -s -X POST "$AM/api/system-api/admin/token" \
  -H "Content-Type: application/json" \
  -d '{ "u": "default", "p": "Choose_A_Password_1" }'
Then call Get all with the token in x-am-authorization :
curl -s "$AM/api/schema/admin/mongodb/shop/products?select=name,price_cents" \
  -H "x-am-authorization: eyJhbGciOi…"
The URL says everything : /api/schema (an API of a table) /admin (the account) /mongodb/shop/products (instance, database, table). API Testing writes this code for you in 21 languages : press its code button.
The group Default allows everything
It is fine to learn, wrong for real users. Step 6 of this path, Secure your APIs, gives each app only what it needs.
The rest of the sample
- Custom APIs : open APIs & Logic → Custom API, folder
default. Each one is a short example of a feature, with comments : deep populate, find and join, caching, WebSocket notifications, a login. - Hooks : the sample keeps each person to their own rows.
- Schemas : the five tables use most features of a schema.